• Skip to primary navigation
  • Skip to main content
  • Skip to primary sidebar
Drag Queen Cooking
  • All about Hennessy Williams
  • Recipes
  • Vegan
  • Desserts
  • Drinks
  • Drop a line
  • Drag Performer Interviews
  • Other Blogging

The Measurements to Tabitha Brown’s Cheesiest Vegan Mac and Cheese!

March 14, 2021 by Hennessy Williams 6 Comments

You can watch the YouTube version of this Tabitha Brown Vegan Mac recipe here:

I’ve been doing tons of food videos but keep forgetting to blog about them. Check out my channel!

Hi loves! Awhile back, I came across Tabitha Brown‘s charming Vegan Mac and Cheese recipe that she shared on YouTube. I first found out about this through Goodful, which is a great YouTube Channel I love which features a lot of vegan recipes. In the original video I watched, which was a showdown for the best Vegan Mac, Tabitha won hands down. I had already heard of Tabitha through her soothing viral videos on Facebook and TikTok, so I was not surprised that she won.

Tabitha Brown's Mac and Cheese for Pinterest

I love Vegan Mac, and even though I’m pescatarian, I’m also slightly lactose-intolerant and I’ve never really been a fan of the taste of cheese. But I love comfort food and that makes me a huge fan of vegan mac, with all of the spices used to imitate cheese as well! I’m on the hunt to try as many recipes as I can!

Now Tabitha doesn’t include measurements in her video, so there was a bit of guesswork involved. Her dish was amazing so I’d recommend it for anyone looking for a good vegan mac! Here’s her recipe, converted from the measurements I used.

tabitha's vegan mac and cheese in a blue dutch oven

Tabitha Brown’s Vegan Mac and Cheese

Tabitha Brown
This delicious vegan macaroni and cheese recipe features butternut squash, potato, and Daiya cheese shreds. Tabitha's original recipe doesn't have measurements, so I've gone in and done the work for you all.
5 from 1 vote
Print Recipe Pin Recipe
Prep Time 10 minutes mins
Cook Time 25 minutes mins
Course Dinner, lunch
Cuisine American
Servings 4 people

Equipment

  • Dutch Oven
  • Peeler

Ingredients
  

  • 1 medium butternut squash
  • 1 Yukon or Russet potato, diced
  • 4-6 oz vegan butter
  • garlic powder & herbs, to taste
  • 1 lb of shell or macaroni pasta
  • 1 tsp Himalayan sea salt
  • 4-6 oz plain vegan almond or coconut milk yogurt
  • 4 oz Daiya Vegan Cheddar Shreds
  • 4 oz Daiya Vegan Mozzarella Shreds
  • 1/3 cup Nutritional Yeast
  • 1/4 cup vegetable broth
  • paprika, optional or to taste

Instructions
 

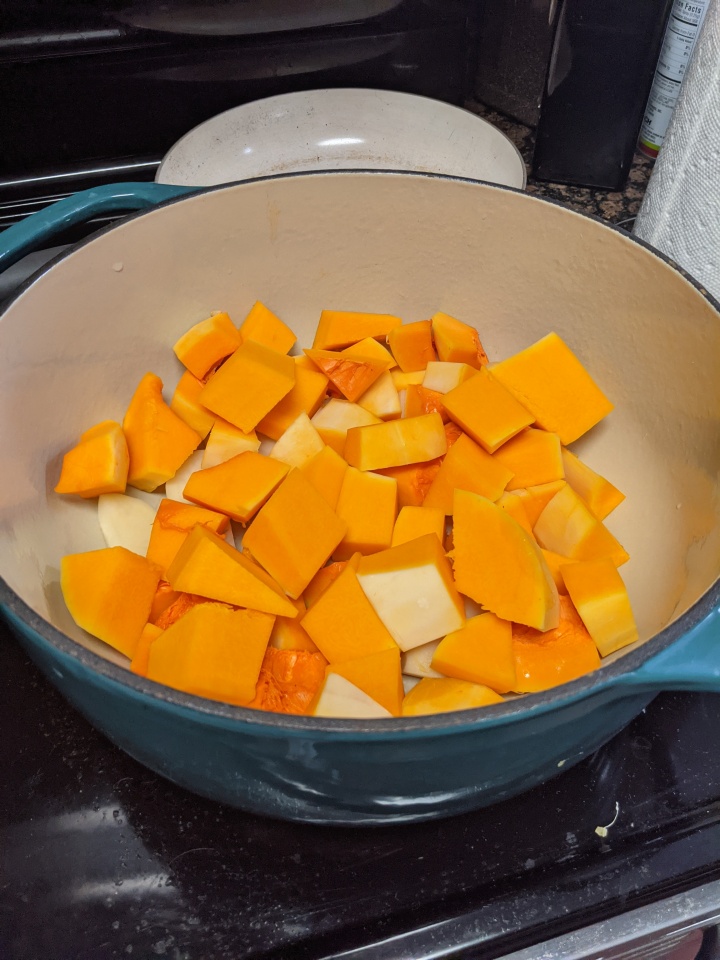
  • Peel and dice your butternut squash and potato. Once the vegetables are diced, add them to a Dutch oven or stockpot with water and simmer on medium heat for about 20-25 minutes.
  • Towards the end of the 20 minutes, boil your pasta based off the package directions. Use a teaspoon of pink Himalayan sea salt to season.
  • Strain the squash and potato, it should be soft enough to be mashed with a fork. Then put them back into the Dutch oven with 4-6 ounces of vegan butter.
  • Sprinkle garlic powder and herbs (I used oregano) to your liking. Then add 4-6 ounces of vegan yogurt and half a package (4 ounces) of vegan cheddar and mozzarella shreds.
  • Add nutritional yeast and veggie broth. Stir it all together and simmer for 10-20 minutes until the mixture is smooth. Use a wooden ladle or spatula to crush any pieces of potato or squash or use an immersion blender to smooth the mixture.
  • Take your strained pasta and mix it in with the sauce.
  • Optional: You can also bake it for the "baked mac and cheese" taste. I skip this step.
  • Sprinkle with paprika.

Video

Keyword butternut squash, macaroni and cheese, tabitha brown, vegan cheese, vegan mac and cheese

The Butternut Squash

So funny story, I was scared of using butternut squash after an incident involving a cheap Dutch oven that got too hot and broke on the stove. The first time I made this, I wanted to make sure my squash softened correctly, so I opted to bake it for 10 minutes at 350 degrees. I skip this step now, as it will get soft enough if you simmer it long enough.

By the way, you can also use packaged butternut squash to save yourself the hacking of that tough root vegetable. I also tried frozen packaged butternut squash from Target, but the 12oz bag is far too small. You’ll need double that amount, or 24 ounces if you want to go with pre-cut squash. The good news is that you won’t have to simmer your squash for nearly as long.

The Cheese!

By the way, have you ever tried Daiya vegan cheese shreds? You don’t need the exact brand, as Follow Your Heart also makes great mozzarella shreds. But Daiya is the preferred brand because so much of us love how it melts similar to real cheese. I use it in a recipe I make myself for a nice afternoon snack, cheesy Grillers Crumbles quesadillas. You can make them with the cheese you have left over!

If you don’t have access to vegan cheese shreds, or don’t like vegan cheese, it still tastes delicious without. In fact, I imagine some non-cheese fans would like it even more. I’m not a big cheese fan myself, so sometimes even realistic vegan cheese can be overpowering. It’s okay to leave it out.

There’s Yogurt, Too?

When in doubt, coconut yogurt is the way to go as a vegan option, and if you’re not vegan, plain unsweetened regular yogurt should work as well. Don’t do sweetened or vanilla yogurt, however. It’ll completely ruin the taste and you’ll have to start over. You have been warned.

I’m a bad vegan, (well, I’m not vegan actually. Don’t tell Tabitha!) so I often used Greek Yogurt instead of plant-based yogurt. However, once I tried coconut yogurt, I was sold forever. It gives the cheese a much milder taste, which I quite like! Admittedly, I haven’t been successful in finding almond milk yogurt before. My local stores do carry cashew & macadamia yogurt however.


In the end, this recipe compares well to my other favorite Vegan Mac and Cheese recipe, by Detox Inista. Detox’s recipe, while delicious, is much drier. That said, it is much easier to prepare than Tabitha’s recipe, which involves hacking up a squash. Tabitha’s recipe feels more like a luxurious “special occasion” mac while Detox Inista’s recipe is more everyday. With the price of vegan cheese & yogurt versus cashews, the Detox recipe is a little cheaper as well. I also made my own spicy version of Detox’s recipe, which you can try here. It’s been my recent pride and joy!

If you’re curious in the other Vegan Mac recipe, you can see me making it here too!

The original!

Overall, both recipes are great, albeit very different. The Spicy Serrano Vegan Mac and Cheese recipe is now one of my most popular recipes after this one, and I’m glad that this recipe’s spicy cousin is getting so much love!

What do you think? Let me know if you have a favorite vegan mac recipe as well!


Did you like this article? Please give it rating if you give it a try, and if you like it, make sure to check out Tabitha Brown‘s social media channels and website, and also check out some of the other interpreted or original recipes on this blog. Enjoy, and stay cheesy and healthy!

Filed Under: Food Diary, Meals, Recipes, Vegan Tagged With: daiya cheese, daiya cheese shreds, how to make, ingredients, recipe, tabitha brown, tabitha mac and cheese, vegan mac and cheese

Let’s Make Vegan Eggplant Lasagna with Vegan Cheese!

March 2, 2021 by Hennessy Williams 1 Comment

Awhile ago, someone on my YouTube channel mentioned that they’d like to see me make a lasagna with three different types of cheeses. Well I’m not the biggest cheese person, but vegan cheese sounds great! So ta-da! Introducing this vegan cheese and eggplant lasagna.

First, I’d like to give credit where it’s due and share that I found the base for this recipe through Kate from Cookie + Kate in her Eat Real Food book. This book is one of my favorites and it’s filled with delicious vegetarian food. Kate still loves cheese, though she provides plenty of vegan options.

Katheryne Brown's original Roasted Eggplant Lasagna recipe

So to give myself a challenge, and because I’m not the biggest fan of dairy, I decided to make a vegan version of her recipe! I used all vegan cheese – with Follow Your Heart mozzarella and homemade cottage cheese!

  • Follow Your Heart Mozzarella Shredded Cheese
    Follow Your Heart Mozzarella Shredded Cheese
  • vegan cottage cheese that I made
    Vegan Cottage Cheese I made

Much thanks to Vegan Family Recipes for their vegan cottage cheese recipe. Alternatively, you can find packaged vegan cottage cheese at health & organic markets, but all the stores were closed by the time I started preparing my vegan eggplant lasagna.

This vegan eggplant lasagna was a lot of work, but it was absolutely worth it. If the two hour preparation time isn’t feasible to you, note that you can cut it down by buying your own vegan cottage cheese, tomato sauce, and making sure you buy oven-ready lasagna.

Otherwise, I have all the resources ready for you in this recipe here! Scroll down to see some visual guides for how I layered the tomato sauce, cheeses, lasagna, and eggplant.

vegan eggplant lasagna

Vegan Eggplant Lasagna with Vegan Cheese

This delicious lasagna recipe is adapted from Cookie+Kate's Love Real Food but includes a vegan twist with plant-based cottage cheese and mozzarella.
Print Recipe Pin Recipe
Prep Time 2 hours hrs
Cook Time 30 minutes mins
Course Dinner
Cuisine American
Servings 4 people

Equipment

  • food processor
  • large baking dish, 9×9 or larger
  • Parchment Paper
  • skillet
  • foil

Ingredients
  

Roasted Eggplant

  • 1 medium eggplant
  • 2-3 tablespoons olive oil
  • salt & pepper

Tomato Sauce

  • 1 can diced tomatoes, drained
  • ¼ cup chopped fresh basil or two tablespoons ground basil
  • 2 tablespoons olive oil
  • 2 cloves garlic
  • ½ sea salt
  • ¼ red pepper flakes

Vegan Cottage Cheese

  • 12.3 oz silken tofu
  • 3 tablespoons raw cashews, soaked
  • 3 tablespoons almond milk
  • 1 teaspoon apple cider vinegar
  • 1 teaspoon nutritional yeast

Spinach Mixture

  • ¼ teaspoon salt
  • 1 tablespoon olive oil
  • 1 cup chopped red onion
  • 4 cloves garlic
  • 5-6 ounces baby spinach
  • salt and pepper

Putting it All Together

  • 9 no-boil oven ready lasagna noodles
  • 2 cups vegan mozzarella
  • fresh basil for garnish

Instructions
 

Roast the Eggplant

  • Preheat the oven to 425°F. Line a baking sheet with parchment paper.
  • Slice off the round ends of the eggplant and then slice on its long side. Make your slices about half an inch thick, as even as you can. You toss the slices with the skin still on it.
  • Brush those slabs with olive oil, and then arrange them on the baking sheet. Add salt and pepper and roast for 20 minutes, turning halfway.

Make the Tomato Sauce

  • To make the tomato sauce from scratch, combine the tomatoes, basil, olive oil, garlic, salt and pepper flakes. Process until it is smooth and nearly pureed, and then set aside in a bowl.

Make the Vegan Cottage Cheese

  • Crumble up silken tofu and add it to the food processor with cashews, almond milk, vinegar, and nutritional yeast until smooth to turn into sauce. Set the cottage cheese mixture aside.

Make Spinach Mixture

  • Warm olive oil over medium heat into a skillet and cook the onion with salt. Cook and stir until onion is translucent, about 4-5 minutes. Add the garlic and cook for 30 seconds.
  • Toss in spinach until all of the spinach has wilted, for about 3 minutes.
  • Put the whole mixture into the food processor and pulse until it's chopped, but not pureed, about 5-7 pulses. Transfer the mixture to a bowl and mix with the cottage cheese, with salt and pepper.

Assemble it all together

  • Spread half a cup of tomato sauce over the bottom of your dish. Layer 3 lasagna noodles on top. Spread half the cottage cheese and spinach mixture over the noodles evenly. Then arrange half the eggplant slices over it. Top that with ¾ cup tomato sauce and half a cup of vegan mozzarella.
  • Top with 3 more noodles, and the remaining cottage cheese mixture. Arrange the rest of the eggplant over the slices. Sprinkle another half cup of the mozzarella on top.
  • Finally, top with the 3 remaining noodles, and spread the last ¾ cup of tomato sauce over the top to cover the noodles. Sprinkle with the last cup of vegan mozzarella.
  • Wrap a sheet of foil over the lasagna carefully so it doesn't touch the cheese. Bake covered for 18 minutes, and then take the cover off, rotate the pan, and bake for another 12 minutes, or longer until the cheese melts and the top begins to darken slightly. This may vary if your mixtures are more watery.
  • Remove from oven and let the lasagna cool for 15-20 minutes. Then, garnish with basil and serve.

Notes

This is a doozy of a recipe, but it can be simplified through the following.
  1. You can use store-bought tomato sauce or even pasta sauce instead of the homemade provided recipe.
  2. You can also use store-bought vegan cream cheese, (Kite Hill is one such brand.)
  3. Lastly, use oven-ready lasagna. If you can’t find those, just prepare your lasagna per the package instructions and strain before using. 
This lasagna does great as leftovers, as cooling it in the refrigerator helps the layers to seal better together.
Keyword Eggplant, Lasagna, vegan, Vegan Lasagna

Putting it all together

  • lasagna over the pasta sauce
    First you start with pasta sauce and lasagna noodles.
  • now add spinach-cottage cheese and eggplant
    Add the cottage cheese-spinach mix and eggplants
  • add one more layer
    Add another layer of lasagna noodles and cottage cheese-spinach over it
  • yet more eggplant
    last layer of eggplant
  • last layer of lasagna
    now cover that up with the last layer of lasagna
  • pasta sauce and cheese
    Top with pasta sauce and mozzarella cheese!
Setting up the lasagna might seem difficult to beginners but I promise it’s easy! Here’s a visual aid to help.

As someone that grew up in a Chinese household, this might be the first time I’ve had lasagna that I enjoyed! Not to rag on lasagna… but the ones in school lunches were never too great.

This dish was a ton of work, but I’m glad I made it.

  • finished vegan eggplant lasagna dish
    This ended up being watery because I forgot to strain my tomatoes… doh! But it still tasted amazing!

What do you think? If you enjoyed this, definitely check out Cookie + Kate‘s Eat Real Food book for the masterpiece of the idea. I don’t promote cookbooks unless I like them, and this one has definitely been one of my most utilized cookbooks of all time.

And thanks to Vegan Family Recipes for their vegan cottage cheese recipe.

What’s next? I can’t wait to share more of my hearty dinner favorites!


Note, this blog post is not sponsored by Cookie + Kate, Vegan Family Recipes, or Kite Hill. However, it contains an affiliate link from Amazon. I get a small commission if items are purchased through the link at no cost to the buyer, regardless of the item of choice being promoted.

Filed Under: Meals, Recipes, Vegan Tagged With: cookie + kate, dinner, dinner recipe, eat real food, eggplant, kite hill, lasagna, vegan eggplant lasagna, vegan family recipes, vegan lasagna

Featured Cocktail of the week: Woo Woo!

February 24, 2021 by Hennessy Williams Leave a Comment

This cocktail is as good as it sounds: Woo Woo! With 3 1/2 ounces of cranberry juice, it’ll definitely give you a Vitamin C boost, plus syrupy Peach Schnapps to round it out. Absolutely thirst-quenching and yummy.

There’s a reason why vodka and cranberry work together. Something about the sweet tartness of the cranberry rounds out the harshness of the alcohol. This pretty little cocktail is one of my favorites of the moment, and it’s super easy to make. You won’t even need a cocktail shaker.

I used the Ocean Breeze brand, yes of the Fleetwood Mac fame, and 40 proof Stolichnaya vodka.

Like the others I’ve made recently, this tasty lil concoction comes from The Art of Mixology! It became popular in the 80s along with other drinks using Peach Snapps. I haven’t heard of the drink before the book, but I definitely give it my drink mixer’s seal of approval to come back into vogue.

But enough history, let’s get to making it!

woo woo vodka cocktail

Woo-Woo

This simple and refreshing cocktail is made with crushed ice, cranberry juice, vodka, and peach schnapps. It'll definitely have you saying it's name. Enjoy!
Print Recipe Pin Recipe
Course Drinks
Cuisine American
Servings 1

Equipment

  • Martini Glass

Ingredients
  

  • handful of crushed ice
  • 3½ oz cranberry juice
  • 1¾ vodka
  • 1¾ Peach Schnapps

Instructions
 

  • Put several ice cubes in a quart-sized bag and crush them with a rolling pin or by hitting it against the table.
  • Pour the cranberry juice over the ice, and then add in the vodka & peach schnapps.
  • Stir and enjoy!

Notes

This drink is perfect without a garnish, but if you’d like to add an extra bit of flair, a small wedge of lime or orange peel couldn’t hurt. 
Keyword cocktail, Cranberry Juice, Peach Schnapps, Vodka

What do you think of this Woo Woo cocktail? This is one that I’m certain I’ll be making again!

woo woo cocktail for pinterest

For more drinks like these, I highly recommend the Art of Mixology for anyone on a mixologist kick. Plus, you’ll find more uses for your cranberry juice or Peach Schnapps if you’d like to buy it just for this drink.

What sort of cocktail should I make next or experiment with? Let me know if you have suggestions.


Note, this blog post contains an affiliate link from Amazon. I get a small commission if items are purchased through the link at no cost to the buyer.

Filed Under: Drinks, Food Diary, Recipes Tagged With: 80s, alcohol, alcoholic drink, art of mixology, cranberry juice, drink, ocean breeze, peach schnapps, stoli, stolichnaya, vodka, vodka cocktail

How to make the most delicious Strawberry Rosé Lassi

February 22, 2021 by Hennessy Williams 3 Comments

Every now and then, I’ll make a drink that’ll have me go, “Eureka!” And you know it’s going to be included in your future recipe repertoire. Today that drink is Strawberry Rosé Lassi. And boy is it good.

delicious strawberry Rosé lassi
This was absolutely delicious, plus it’s naturally sweetened and healthy!

To flavor this lassi, I used Medjool dates, which is nature’s natural sweetener. They add a delicious kick of sweet honey-like flavor. (Admittedly though, they’re not low in calories, so don’t go overboard on adding them!) You can find Medjool dates in health stores or organic groceries. But if you don’t have them, there’s nothing wrong with using a tablespoon of cane sugar, simple syrup, agave, or honey instead.

I got the idea of using Medjool dates and Greek Yogurt as opposed to the more traditional full-fat regular yogurt from Love Real Food, which includes a scrumptious breakfast Mango Lassi recipe.

Additionally, Sasha Gill from East Meets Vegan introduced me to rose water, which is really like nothing else. A dash of rose water goes a long way! To get rose water, you can find it at your local Indian grocery store. I use the Sadaf brand. However, if there aren’t any near you, you can also order it online here. But it will probably be cheaper in stores.

I used a little almond milk to make the Strawberry Rosé Lassi more liquid and easier to blend but you can also sub with regular milk or your favorite plant-based milk. Lastly, you can of course use fresh strawberries as well. The frozen ones make your drink cold nicely without ice, but if you use fresh, throw in a few ice cubes as well. Enjoy!

delicious strawberry Rosé lassi

Strawberry Rosé Lassi

This delicious and thirst-quenching fruit packed smoothie is sweetened with Medjool dates and a touch of rose water.
Print Recipe Pin Recipe
Prep Time 5 minutes mins
Course Breakfast, lunch
Cuisine Indian
Servings 2 people

Equipment

  • High-Powered Blender

Ingredients
  

  • 2 cups frozen diced strawberries
  • 1¾ cups Greek yogurt
  • ¼ cup almond milk
  • ½ teaspoon Indian Rose Water
  • 2 Medjool Dates
  • optional to garnish: mint, strawberry, cardamom

Instructions
 

  • Remove the pits from your Medjool dates and dice your strawberries.
  • Combine all the ingredients into the blender and blend. If your blender won't blend at first, you may have to wait a few minutes for the strawberries to defrost.
  • Pour into a glass and garnish with a few slices of strawberries or mint.
Keyword Drinks, Greek Yogurt, Smoothie, Strawberry

delicious strawberry Rosé lassi
Absolutely delicious!

The fun thing about lassi is that there’s so much room for creativity aside from the simple base of yogurt + fruit or spices. Try adding cardamom on top, or sprinkling it with saffron. The sky’s the limit.

Hungry for more?

  • If you like mangos and peaches, try my Dreamy Peach Mango smoothie, which is super similar to this.
  • If you’d like to try other Indian-inspired drinks, check out my Lavender Chai Latte.

Let me know if you have any suggestions on future smoothies to make and have fun!


Note, this blog post contains an affiliate link from Amazon. I get a small commission if items are purchased through the link at no cost to the buyer.
Filed Under: Breakfast, Drinks, Food Diary, Recipes Tagged With: delicious, greek yogurt, https://dragqueencooking.com/how-to-make-the-most-delicious-strawberry-lassi/, lassi, medjool dates, rose water, smoothie, strawberries, strawberry, strawberry lassi, yogurt, yummy

How to make Whiskey Sangaree

February 17, 2021 by Hennessy Williams 1 Comment

Whiskey Sangaree? Yes please!

I’m a big bourbon fan, and for the longest time, an Old-Fashioned was my favorite drink. At age 21, I had a very modest income from multiple part time jobs, but invested in bitters, bourbon, and sugar to make it.

Recently, I bought The Art of Mixology and decided to try my hand at a few cocktails. I found a sweeter alternative to the Old-Fashioned that is now a favorite of mine! Meet the Whiskey Sangaree, a thirst-quenching drink in an old-fashioned glass made with bourbon, sugar syrup, club soda, and port. Here are all the ingredients you’ll need right here.

simple syrup, glass, port, bourbon and sparkling water
Oh and don’t forget the ice!

This drink is damn good – well balanced with sweetness, some bubbles, and vanilla-y strong bourbon. Here’s how to make it!

whiskey sangaree

Whiskey Sangaree

This on-the-rocks bourbon cocktail is sweet and strong, and great for a delicious evening treat.
Print Recipe Pin Recipe
Servings 1

Ingredients
  

  • 4-6 ice cubes
  • 1¾ ounces bourbon
  • 1 teaspoon sugar syrup
  • 3 teaspoons club soda or sparkling water
  • ½ ounce Ruby Port
  • freshly grated nutmeg

Instructions
 

  • Put ice into a chilled glass.
  • Measure and add the bourbon and sugar syrup. Add 3 teaspoons of club soda, or more to your liking. Stir to mix.
  • Float the port on top. Sprinkle with nutmeg and enjoy.

Notes

I used Maker’s Mark for this drink and enjoyed it immensely!
Keyword bourbon, non-alcoholic, whiskey sangaree

Let me know what you think! I made this Whiskey Sangaree for myself after a virtual drag show and it had me feeling quite fancy on a Saturday evening.

  • Hennessy Williams in a black bodysuit in drag
  • Whiskey Sangaree

Cheers! By the way, check out this other delicious non-alcoholic drink recipe from the same book. I highly recommend the Art of Mixology for anyone that enjoys feeling fancy with a good cocktail.

Will be making more recipes soon! Until then, I’ll see you next time.


Note, this blog post contains an affiliate link from Amazon. I get a small commission if items are purchased through the link at no cost to the buyer.

Filed Under: Drinks, Food Diary, Recipes Tagged With: alcohol, art of mixology, bourbon, club soda, drink, old-fashioned, port, recipe, sparkling water, sugar syrup, whiskey, whiskey sangaree

How to Make Spicy Serrano Vegan Mac and Cheese!

January 31, 2021 by Hennessy Williams 3 Comments

Here’s my adaptation of a popular internet vegan favorite – Spicy Serrano Pepper Vegan Mac and Cheese recipe! Here’s the story behind it.

vegan jalapeno mac and cheese
So so good!

Detox Inista’s Vegan Mac and Cheese recipe is one of the most popular Vegan Mac recipes on the internet. Clocking in at a 4.77 rating after 313 reviews at 2021, it definitely should not be underestimated. I highly recommend checking out her original recipe at the link above if you haven’t before.

This is what started it all with my vegan mac and cheese obsession. Ever since then, I’ve craved that delicious bowl of warm vegan mac for lazy Sunday dinners. I’ve even made two different YouTube videos trying her recipe & Tabitha Brown’s recipe below!

I’ve made Detox Inista’s recipe dozens of times now, and I thought it was time to add my twist to it. I’m a bit of a Mac and Cheese purist (well, aside from the vegan part,) so I’m picky about what else goes inside the Mac aside from cheese. I like it to blend all together and complement rather than overpower the cheese.

So I made a few adjustments to their recipe, with serrano pepper as the main star to add an extra kick. Like many well-flavored vegan recipes, Detox Inista’s original has a well-placed kick of spice, with ingredients such as chili powder, paprika, and cayenne powder. I wanted to up the ante a bit, and also adjust the recipe for my preferences.

For example, her recipe also seemed to run drier with my blender, so I increased the amount of water and decreased the amount of pasta. I adjusted the other ingredients, and voila, that’s how you get Hennessy’s delicious Spicy Serrano Pepper Vegan Mac and Cheese!

The final product is a gorgeously yellow-orange peppered bowl of macaroni and cheese, with some sprinklings of serrano peppers. If you like your heat, you’re sure to be a fan of this.

vegan jalapeno mac and cheese

Spicy Serrano Pepper Vegan Mac

Based off Detox Inista's original recipe, this ups the ante on the spice with serrano peppers as the main star.
Print Recipe Pin Recipe
Prep Time 10 minutes mins
Course Dinner, lunch
Cuisine American
Servings 4 people

Equipment

  • Blender

Ingredients
  

  • 1½ cup raw cashews, soaked in water
  • 2 thinly diced and deseeded serrano peppers
  • 3 tablespoons fresh lemon juice
  • 1 cup vegetable broth
  • 1½ teaspoons salt
  • 1/4 cup nutritional yeast
  • 1 teaspoon chili powder
  • 1-2 cloves garlic
  • ½ teaspoon turmeric
  • 1 teaspoon cayenne pepper
  • ½ teaspoon Dijon mustard
  • 14 oz Elbow or shell pasta little less than 1lb or one box of pasta
  • handful of paprika for garnish

Instructions
 

  • Soak your cashews for 5 minutes to 2 hours depending on the strength of your blender. Prepare the pasta according to package directions & add a pinch of salt. Then drain and set it back into the pot, off the heat.
  • Slice, deseed, and dice your jalapenos and add them to the blender, along with the drained cashews. Combine all other ingredients into the blender except for the paprika (lemon juice, vegetable broth, salt, nutritional yeast, chili powder, garlic, turmeric, cayenne pepper, Dijon mustard.)
  • Blend until smooth, scrape the sides if needed. If your blender is struggling to puree the sauce, add a little bit of water and try again.
  • Pour the mixture into the pot. Use a scraper to get everything off the sides. Mix well with a wooden spatula or spoon. Top off with paprika and enjoy!

Notes

If you have a high-powered blender, you can do what I do and drop your cashews in water while you prepare everything else. If your blender is a piece of crap like my old one, you should definitely soak them for at least 2 hours so they soften enough to blend.
I always try to wear food gloves while handling peppers and washing my hands immediately after, because these little buggers can STING when I touch my face later. 
Make sure to remove the seeds if you can only handle so much serrano peppers, they’re the main source of heat in the peppers. 
The cup of vegetable broth adds extra depth to the mac and cheese, but if you don’t have any on hand, a cup of water will still bring you a delicious dish!
Keyword macaroni and cheese, serrano peppers, serranos, vegan, vegan mac

Why Serrano Pepper?

Serrano peppers are my favorite peppers! I have a hilarious confession in that I used to buy them without realizing that they weren’t jalapeño peppers. Unlike a lot of young cooks, I’m mostly self-taught through books, videos, and improvisation. I used to walk to my local grocery and pick out what I thought were jalapeño peppers and add them to my soups, savory pancakes, and curries. Now I realize that they’re actually Serrano peppers and it blew my mind entirely. I’ve tried this recipe with jalapeños, but I haven’t liked the flavor as much. However, you’re welcome to sub this mac and cheese with jalapeños or any peppers you’d like. That’s the fun part of cooking!

Veggie Broth or Water?

If you don’t have veggie broth, you can always use water instead. I love using veggie broth however, because it adds a savory kick to this mac and cheese. I always keep some in my fridge to splash for this reason.


What do you think of this recipe? If you enjoyed this, I’d love to know your thoughts and if you made any changes as well. Don’t forget to check out my blog for similar fun & delicious plant-based recipes. Bon Appetit!

Filed Under: Meals, Recipes, Snacks, Vegan Tagged With: cayenne pepper, chile, chili pepper, chili powder, delicious, detox inista, jalapeño, jalapeños, mac and cheese, macaroni, paprika, pepper, recipe, serano pepper, serrano, serrano pepper, spicy, vegan cheese

Let’s Make “Under The Boardwalk” – A Deliciously Fruity, Slushy Cocktail

January 28, 2021 by Hennessy Williams 2 Comments

This drink is absolutely delicious. Here’s the recipe for the Under the Boardwalk non-alcoholic cocktail!

Watch the video guide for this recipe here!

A while ago, I bought myself this fun coffee table book The Art of Mixology! It has a vast lovely collection of cocktails, so much though that I didn’t know where to start! I was preoccupied with cooking and baking at the time, so it sat under my coffee table shelf until recently.

I’ve been attempting to read through Irma Rombauer’s famous Joy of Cooking recently, and it begins with drinks and cocktails. This reinvigorated my desire to make drinks and now I’m all into it! So I hit up my local liquor stores and bought more juice than I ever remember buying before.

With cocktails, there’s a bit of upfront cost that isn’t cheap if you want to get serious with it. Each cocktail in the book is different, sometimes specifying the brand name of the liqueur (ie: Grand Marnier,) other times asking for a very specific flavor like peach vodka, or apple brandy. There’s also aperitifs, mixers, fruit syrups, different types of sugars, and other ingredients to collect.

For my Hennessy’s Great Baking Show episode, I needed a drink that I could quickly make, with all of the ingredients. Because I was baking a fruit cake, I always wanted something fruity.

So here’s the drink I picked! Under the Boardwalk is a deliciously peachy, citrusy delight with flavor and texture. The spritz of sparkling water makes it absolutely scrumptious, and the recipe is simple to make!

Surprisingly, it was printed in the “Bubbles” section of the book, not the Mocktails section, even though it is non-alcoholic. However, adding a dash of rum is just what you need to make it a little boozy.

The slush may be hard to blend at first, but have no fear, because the juxtaposition of slushed ice and sparkling water is exactly what makes it amazing! Here’s how you can make it.

hennessy with her under the boardwalk drink

Under The Boardwalk

This drink is fruity, fun, and bubbly all without alcohol!
Print Recipe Pin Recipe
Course Drinks
Cuisine American

Equipment

  • Blender

Ingredients
  

  • 1½ ounces lemon juice
  • 1/2 peach or 3-4 frozen peach slices
  • 1 teaspoon simple syrup
  • handful of ice
  • splash of sparkling water
  • raspberries for garnish

Instructions
 

  • First, measure out your lemon juice with the peach, simple syrup, and ice. Blend until it becomes an icy slushy.
  • Add the slush to a highball or Hurricane glass and gently pour sparkling water over it.
  • Add a raspberry as a garnish and serve immediately.

Video

Notes

Make sure to not to overdo the lemon juice as it will make the drink too sour.
This drink is delicious without alcohol, but you could also add a splash of rum to make it an alcoholic drink. 
Keyword cocktail, non-alcoholic, Under the Boardwalk

Hennessy’s Great Baking show is my monthly Twitch show. You can watch it every last Sunday of the month at 1PM on Media Meltdown at Twitch.TV/MediaMeltdown. Afterwards, a condensed version of the show will go up on YouTube. I highly encourage you all to tune in!


Note, this blog post contains an affiliate link from Amazon. I get a small commission if items are purchased through the link at no cost to the buyer.

Filed Under: Drinks, Food Diary, Recipes Tagged With: alcoholic, cocktail, frozen, peaches, raspberries, recipe, rum, slush, slushie, under the boardwalk

The Quick and Easy Guide on How to Style Drag Queen Wigs

January 25, 2021 by Hennessy Williams 2 Comments

Here’s an introduction on how to style wigs for a drag queen. If you’re just starting out in drag, eventually you’re going to have to get some good wigs – why not do it yourself?

So now that you’ve decided that you want to do drag, you’re going to need to have wigs. There are some options for this. You can buy some cheap “pre-styled wigs” off Party City, or Amazon, that come in popular styles such as “Elvira,” a classic black bob cut, or wavy blonde curls.

You can pay a wig designer to style you a wig, for anywhere from $85 on Facebook Marketplace or $250+ for a popular designer.

Or, you can learn how to style your own drag queen wigs. And I promise it’s easier than you think.

View this post on Instagram

A post shared by Hennessy Williams (@hennessy_williams)

Your author in one of her early self-styled wigs.

What you’ll need to do it yourself

Believe it or not, you don’t have to spend $200 and up for a good wig. You can style a drag queen wig yourself for cheap, and it’ll cost you less than $100. Here’s how.

  1. Get a base synthetic wig.
  2. Get some styling tools.
  3. Straighten your wig with steam, and then curl your wig with curlers.
  4. Tease.
  5. Style, and then set it in place.

Sound simple enough? Now let’s go in-depth on how to style these wigs for drag queens.

Pinterest pin of Hennessy with a self-styled wig for drag

Getting a Lacefront Wig

Get a base synthetic lace front wig, and it doesn’t have to be a special brand. Most wigs are made from the same manufacturers in China, but brands will charge more for a specific color or style. Some of the well-advertised branded wigs can even be kind of disappointing, (sorry Wigs and Grace.) The only “higher-end” synthetics I’ve heard people recommend are Webster Wigs and Rockstar Wigs, but I’ve never used them.

I’ve done very well with generic Amazon brands, especially K’ryssma and Sapphire Wigs. If you pay more than $50 for a lace front wig, you’re paying for extra.

I would start off with something that looks good and has lots of positive reviews and pictures like this. Remember, if it looks good on your typical Amazon reviewer, it will look even better on you when you’re done with it.

Invest in Styling Tools for your Wig

Buy some styling tools to style your drag wig. Go to your local beauty shop for curlers, t-pins, bobby pins, teasing combs, gator clips, and hair spray. Here are some of my supplies here, not including a wig head and stand.

I’ve had to restock many times but my first batch of supplies probably cost under $50. You need at least a styrofoam head for $5, but I strongly recommend getting a canvas or wood blockhead in your head circumference size. You wanna aim for curlers with metal coils inside that heat up when you heat them. And the golden standard for hairspray or freezing spray is Got2B Glued, though Tresemme Extra Hold works well too.

Having a wig stand will be helpful for longer wigs. You can even make one yourself by gluing a wooden dowel to a piece of wood. I was able to make one by spending less than $10 at Home Depot.

Also great is wig conditioning spray, twill tape, and sectioning clips. Also, try buying curlers in various sizes.

Steam & Reset your Drag Wig

If your drag wig came with light waves, it’s better to straighten them out completely before curling. This is so you have more control over the wig. For this step and the next, you’ll want to have a clothing steamer. Even a small one will work, though eventually, it’s nice to invest in a full-size clothing steamer so you don’t have to keep refilling it.

Straighten your drag wig with steam and a comb, and then proceed with the curling.

Curl & Heat the Wig

To do your bouncy big hair drag queen waves, you’re going to want to use wire mesh rollers. There are also straight styles that are very nice, (in which you can proceed to the next step,) but I included this step because every queen will need to know how to make a big and curly wig at one point.

wig head and rollers
Here’s my extensive box of rollers!

This part can be challenging at first, but soon you’ll be watching Netflix and curling at the same time. Make sure you have at least two packets of curlers, (I use this brand here in 7/8 or 11/16) and plenty of pins to stick your wire mesh rollers. You want to carefully and evenly roll the entire head until it is completely even. Depending on how the original wig is parted, and what style you would like, you can roll the hair in opposite directions for the front and straight down the back, or straight down all the way through.

  • hair all rolled up in curlers
    my purple rainbow wig from the back
  • progress pic of a pink drag queen wig I styled
    my pink wig from the front

Here is a great tutorial from YouTuber Online Kyne on how to do this process for drag queen wigs.

After rolling everything, you want to start steaming the coils until they feel hot to the touch. Make sure to get every part so that the curl sticks to all parts of your wig. Nothing sucks more than unraveling the wig to find out some parts are curly and some parts are limp.

Once the wig is properly steamed for several minutes, you want to “bake” the wig by taking a large plastic bag and wrapping it over the wig and coils. Continue steaming into the opening of the bag until the bag is very very hot. It should take about a minute. Then quickly when you remove the steamer, close and twist the bag so it “traps” the steam and tie it or take it together around your wig head or stand.

Leave the wig wrapped for two hours or overnight. The heat will eventually seep out through a small opening, which is fine. Just to be safe, I wouldn’t start unrolling until at least 45 minutes, to make sure the curls set.

Now you have a slightly damp wig with twisty, ramen-like curls.

Tease the wig

To get your hair to have volume and lift, you’re going to have to tease it. This part can be scary if you’re afraid that you’re making your hair ugly. Trust me, it’s part of the process and it’s similar to makeup. It’s going to have to be ugly and frizzy before it looks pretty.

To tease, take your teasing brush and backcomb the hair quickly with a “flicking motion” until it can stand up by itself. You want to backcomb the “wrong” side, or the side that won’t be visible when you mold the hair. Then freeze the tease by spraying it with a little hairspray.

YouTuber Online Kyne recommends backcombing the entire wig. I recommend focusing on the areas that are carefully molded and then giving several strokes for the rest of the wig to make sure it also has a bit of volume. We want the wig to look shaped, but naturally curly or wavy from the back.

Style your Drag Wig!

This is the part that takes the most creativity and what separates the amateurs from the pros. Each wigmaker has a unique style and their own thumbprint on their wigs, to the point some can recognize a wigmaker’s style from a single glance. But to get started, all you need is a vision.

You can reference drag vintage hairstyle videos like the one I made here.

What are you trying to create? A 60s bouffant? 40s Victory Curls? Or maybe a pretty updo? Visualize the silhouette. This is also a good moment to reference some videos, to see how women from history styled their hair, or study how movie & stage hair designers recreate wigs for your own drag queen wig.

Or if there aren’t drag hair tutorials, try adapting “regular” tutorials to drag hair.

With a lot of practice and even more hairspray, you’ll be able to make your vision come to life. For something like a side-swept drag curls look, you can start by brushing the hair out from their original curls to “soften them up.”

Then for the deeply styled parts, carefully mold the wig with your hands, the side of your brush, and hairspray. You’d be surprised by how powerful a hit of Got2B Glued can be, once the tease is already holding it in place. For more deliberate curls, like finger waves, use gator clips in alternating directions to hold the curls in place before blasting them with freezing spray. To hold hair in place, use bobby pins in an “X” formation for extra stability. Also, make sure to hide the bobby pins as best as you can. Use black pins for dark hair and blond pins for light hair. For colored hair, some people even go to the trouble of painting their pins a primary color!

View this post on Instagram

A post shared by Hennessy Williams (@hennessy_williams)

She is held with faith, trust, a lot of bobby pins, and even more hair spray.

What I recommend is trying to follow a hair tutorial for a deliberate style and recreating it the best you can. Then, you can start to experiment with other looks and add your own style to your drag queen wig as well.


Hennessy in a Rainbow Colored Wig
Here’s me in another style by yours truly!

Did this help with learning how to style drag queen wigs? Let me know if you have thoughts or anything to add. I’d love to see your hair creations as well! Don’t forget to check out our amazing interviews with fellow drag performers!

Shoutouts to folks that I’ve learned from over the years: Online Kyne, Jaymes Mansfield, Nia Politan, and amazing wigmakers that have shared tips and tutorials on their Instagram pages!


Note, this blog post contains affiliate links from Amazon. However, I only recommend items that I have used myself and believe in, such as Kryssma and Sapphire Wigs. I did not get compensated for my purchases and am not being paid to write about any brands. However, I do get a small commission if any items are purchased through Amazon links, at no cost to the buyer. Regardless, I encourage you all to purchase your items at local beauty supply stores or wherever it is most convenient for you all to find them.

Filed Under: Drag Guides, Other Blogging Tagged With: amazon wigs, drag queen, drag queen wigs, drag wigs, hair styling, how to style drag queen wigs, how to style wigs, kryssma wigs, lacefront wig, sapphire wigs, vintage hair

How to make Earl Grey Iced Tea!

January 23, 2021 by Hennessy Williams Leave a Comment

Awhile ago, I shared a recipe for Earl Grey Iced tea, enough just for one person to drink. However, since then I’ve been thirsty for more. What if you want to make a batch for an entire day or a whole party? Here’s the recipe to make the most delicious Earl Grey Iced Tea!

Earl Grey Iced Tea

By the way, this blog is not sponsored by Choice Tea! It’s just what I had on hand. I also like Twinings, Harney and Sons, and Numi for their Earl Grey as well.

Earl Grey Iced Tea

Earl Grey Iced Tea

Here's how to make a simple and lightly sweet iced tea for an everyday drink.
Print Recipe Pin Recipe
Prep Time 15 minutes mins
Course Drinks
Servings 4 people

Ingredients
  

  • 6 Earl Grey Iced Tea Bags
  • 2 cups boiling water
  • 5 cups cold water
  • 1/4 cup honey or granulated sugar
  • handful of ice

Instructions
 

  • In a saucepan, bring two cups of water to boil. Once it is boiling, turn off the heat and add the tea bags. Steep for 15 minutes.
  • Remove the tea bags and pour 1/4 cup of honey or granulated sugar into the tea. Stir with a spoon to make sure it mixes well.
  • Pour your tea concentrate into a pitcher or large container. Add 5 cups filtered cold water, and put it in the fridge.
  • Wait 1 hour to cool completely, and then serve with ice. You can also serve immediately, you will just have to use more ice.
Keyword earl grey, Earl Grey Iced Tea, Iced Tea


Again, if you’d like a batch small enough for one person, just check out my old recipe here.

By the way, this concoction is STRONG. Most recipes recommend 6 tea bags to 8 cups of water, but I cut mine to 7 because I prefer tasting more of the Earl Grey flavor. (It is my favorite boba flavor, after all.)

It may taste a little watered down with the ice, but drink it too late in the afternoon and you might just be a little wired at night. If you’d like a more drinkable light iced tea, just add another cup of water.

This recipe also works well if you’d like a strong English Breakfast iced tea. I would steer clear of Irish Breakfast though, it’s a little strong.

Cheers!

Filed Under: Recipes Tagged With: black tea, cold drink, earl grey, earl grey iced tea, how to, iced tea, sweet tea

How to Make the Easiest Apple Cake by Mary Berry

January 22, 2021 by Hennessy Williams 6 Comments

Here’s how to make Easy Apple Cake by Mary Berry in one simple recipe! This recipe comes from Mary’s book Fast Cakes. You can now see me make this cake in a prerecorded video as well!

One Saturday, I stopped by my favorite local bookstore, Pegasus Books to browse cookbooks, and left with a stack of purchases, including Mary Berry’s Fast Cakes.

Mary Berry's Apple Cake from Fast Cakes

I loved the concept of this. Mary Berry, as many people know, is famous for her appearances on the Great British Bake Off as well as her cookbooks. A lot of what puts people off about baking is how long it takes. Many of these recipes have ingredient lists that are barely a paragraph block long! I spent an afternoon tabbing recipes and was sold.

I can’t say I’m the biggest fan of apples, but this apple cake recipe by Mary Berry caught my eye. First of all, in the United States, you often hear of apple pie, but rarely of “apple cake.” Apple pie is associated with the taste of cinnamon, the crisp crust, sometimes mushy and gooey apples, and lots of sugar. I don’t know if most people have tried a good apple pie, but many of us have had an over-processed “bad” one. Probably from your local convenience store or a sickly sweet cafeteria lunch “dessert.”

My partner said he wasn’t a fan of apple pie, but this one had him change his mind. It has the lovely flavor of almond, with the almond extract being the supporting star of this dessert. This cake is so easy to make and the flavor is well worth the bake time.

weighing apples
This is for show, but you want to peel them and cut them first, so you get an accurate reading.

This recipe has a fairly easy peeling and cutting process with the apples. All you need are two large apples, but you want to make sure to weigh them carefully to make sure you have the right ratio.

  • soaking apples
  • apples in the tin
  • the batter before baking

After soaking the apples, you spread the batter over. Definitely have a food scraper handy because this is sticky! Don’t worry about perfection though. This recipe is foolproof and I promise even a beginner baker and turn out with a fantastic cake.

Mary Berry’s Easy Apple Cake

Mary Berry's simple Apple Cake is delicious and easy to make. Here's her recipe, plus some North America-friendly changes and notes on how I did it.
5 from 2 votes
Print Recipe Pin Recipe
Prep Time 15 minutes mins
Cook Time 1 hour hr 15 minutes mins
Cooling Time 15 minutes mins
Course Dessert
Cuisine British

Equipment

  • Peeler
  • 8-inch cake tin or springform pan
  • Parchment Paper
  • silicone scraper

Ingredients
  

  • 9 ounces cooking apples weigh after peeling and cutting
  • 1¼ cups self-rising flour
  • ¾ cup superfine sugar
  • 2 large eggs
  • ½ teaspoon almond extract
  • powdered sugar to decorate
  • optional: homemade whipped cream as a topping

Instructions
 

  • First, heat your oven to 350° F and line your cake pan with a fitted circle of parchment paper.
  • Peel and thinly slice the apples, then submerge them in a bowl of water.
  • Add flour and sugar into a medium bowl. Add the eggs and almond extract. Carefully, with a a large spoon or spatula, mix the batter until it is even. It is very sticky. Using your spoon, with the help of a scraper, spread half of the mixture onto the tin.
  • Drain your apples and pat them dry with a paper towel. Arrange them over the mixture. Then top with the remaining batter. It'll be hard to spread, but it's okay if the apples show through.
  • Bake in your oven for 1 hour and 15 minutes, or until golden and shrinking from the sides of the pan.
  • Leave to cool for 15 minutes, then turn it out and remove the paper. Top with powdered sugar, and serve with whipped cream.

Video

Notes

Mary’s recipe says “cooking apples,” but I just used what I had which was 1 Fuji & 1 Pink Lady apple. 
Converting from UK-isms:
  • To make self-rising flour, just combine 1 cup of all purpose flour with a quarter teaspoon salt and 1 1/2 teaspoons baking powder. It’s easy! I like to make two cups at a time and store it in a large porcelain jar for later.
  • Superfine sugar is just regular white granulated sugar that has been run through a food processor for about 30 seconds. If you don’t have a food processor, you can also buy superfine sugar, (also called Baker’s Sugar) at supermarkets with well-stocked baking aisles like Lucky’s or Safeway. 
Definitely don’t skip the parchment paper step, as the mixture is very sticky and will be hard to get out of the pan. If you’d like a more sustainable alternative, just use baking spray or butter instead. 
Keyword Apple Cake, Apples, Baked, Easy, Mary Berry

The end result was just too good! My partner and I devoured it within minutes. Like this recipe? Give it a try and let me know what you think. 🙂

One day, I’d like to make a savory version of an apple cake myself. It’s more common in British baking rather than American baking, but it’s not surprising, seeing that half my baking books are written by Europeans, like Mary Berry, herself. By the way, I totally do recommend this book and will probably write a review once I have tried a few more recipes.

See here for more recipes from Mary Berry, like apple cake, honey cake, chocolate cake, and more!

Until then, happy baking and eating! Don’t forget to check out my other recipes like this one by Chetna Makan.


Note, this blog post contains an affiliate link from Amazon. I get a small commission if items are purchased through the link at no cost to the buyer.

Filed Under: Desserts, Food Diary, Recipes Tagged With: almond extract, apple cake, apples, british, easy apple cake, easy cake, gbbo, great british bake off, powdered sugar, quick, self-rising flour

  • « Go to Previous Page
  • Page 1
  • Page 2
  • Page 3
  • Page 4
  • Page 5
  • Go to Next Page »

Primary Sidebar

Welcome to my blog!

I’m Hennessy Williams, a genderqueer drag performer who loves food as much as performing! This is my blog where I write about all things drag, share recipes, and blog weekly about what I’m making and trying.

My website is also a companion blog to my YouTube, where I make full video tutorials and recipes. Be sure to check it out if it’s your first time visiting!

Get More of Hennessy!

  • Facebook
  • Instagram
  • Twitter
  • YouTube

Categories

Like this blog?

Tip me on PayPal!

Copyright © 2025 Drag Queen Cooking on the Foodie Pro Theme