Buche de Noel is the fancy French term for “Christmas log,” or the more commonly-known Yule log. It has a delicious sponge, filling, and is covered with chocolate ganache made to look like a log. This holiday season, I tried this winning recipe from Sally’s Baking Addiction, and I cannot recommend it enough.
Growing up in a Chinese American home, I didn’t really celebrate traditional Christmas with Christmas treats. My family wasn’t really holiday people, also, I tend to say that the only true holiday tradition we had was fighting. So this was actually both my first time making and trying buche de noel, or a yule log!
Sally’s recipe includes extensive work, plus optional sugared cranberries and rosemary, as well as meringue mushrooms! I opted not to do this for my holiday baking show that I had on Twitch, since there would already be a time crunch & commitment for viewers. You can find the full details of the recipe on Sally’s blog, but if you’d like to check out the measurements and notes I took, just keep reading below.
First thing you want to do is preheat your oven to 350F. Then, grease or butter up your baking pan. (You can see my video or Sally’s video for a demonstration.) Sally recommends a 12 x 17 baking pan but my 10 x 17 Pyrex also did the trick. I used PAM baking spray that I got from a local supermarket, which worked well. The goal here is to get your pan or dish to be as flat as possible so it can form a strong foundation for your rectangular cake roll.
Cake Ingredients:
1 and 1/3 cups cake flour
2 Tablespoons unsweetened natural or dutch-process cocoa powder
1 teaspoon baking powder
1/2 teaspoon salt
6 large eggs, separated and at room temperature
1 cup (200g) granulated sugar, divided
2 Tablespoons (30ml) vegetable oil, canola oil, or melted coconut oil
1 and 1/2 teaspoons pure vanilla extract
Sally’s Baking Addiction
You measure and mix the dry ingredients, (cake flour, baking powder, cocoa powder, and salt) and then you want to open six eggs and separate the egg whites and yolks. After that, you take the egg whites and half a cup of sugar, and using a stand mixer*, whip it to stiff peaks, (4-5 minutes by stand mixer.)
Remove the half the meringue and add it another container to stand by briefly. Then add the yolks and mix on low for 10 seconds. Then add the rest of the meringue and mix for another 10 seconds on low. Then add the rest of the sugar, oil, and vanilla extract to the stand mixer bowl. You don’t have to wash it since it all becomes the same mix. Sift half the dry mix in and beat at low speed, and then sift the other half in, altogether for 3-4 minutes. Now, the mix will magically change color, and become lighter which I thought was pretty cool!
Take your lovely batter and spread it so that it’s evenly distributed on the baking pan.
Here, Sally recommends you hit the pan against a surface to release some air bubbles. I don’t know how much this helped, but this got me stuck in a rut as I have trypophobia and I strongly do NOT recommend looking at the air bubbles while they pop *screaming!!!*
Then, bake for 18-19 minutes.
Once it’s done, the cake should sproing back as you poke it with your finger. Very nice.
* A stand mixer is recommended for the heavy duty whipping. A hand mixer will also work. I do not recommend whipping by hand unless you’re a glutton for punishment and carpal tunnel.
Now here’s the tough part in which I strongly recommend checking out the video, timestamp 10:00 to 12:00 on mine, (this video below should start immediately there.)
Take a nice clean kitchen towel you don’t mind covering in cocoa dust and lay it flat on your clean kitchen counter. Use a fine mesh sieve, and dust 3 tablespoons of cocoa powder. This gets everywhere, and you can probably get away with less if you want to make less of a mess. As soon as the cake comes out of the oven, loose the edges with a knife and then carefully invert it onto your kitchen towel. Peel off the parchment paper on its back. You don’t want to wait on this step because the sponge WILL harden, leaving it unrollable, as anyone watching Great British Baking Show will know with the Swiss rolls.
Take the end of the towel and roll it forward until the whole cake becomes enveloped into a little roll / towel baby that you can see at the end of the time stamp. Set it into your refrigerator now for 3 hours or up to one day. You don’t want it to get too stiff, either.
Now you are free to go watch TV, or clean up your kitchen for the next three-ish hours to a day. When you’re ready for the whipped cream & ganache topping, you want to do them together to save time.
Here’s the recipe for the Cocoa Hazelnut Whipped Cream from Sally. Except, I didn’t use Frangelico liquer and used Kahlua instead. So it was more coffee tasting. I’ll let you decide, but the coffee taste was bomb! I would do it with Kahlua again in a heartbeat.
Cocoa Hazelnut Whipped Cream
1 and 1/4 cups cold heavy cream
2 Tablespoons Frangelico liqueur or Kahlua
3 Tablespoons confectioners’ sugar
1 Tablespoon unsweetened natural or dutch-process cocoa powder
1/2 cup (60g) finely chopped hazelnuts (optional – I didn’t use this)
Sally’s Baking Addiction
This comes together pretty quickly. You put all the ingredients together first, and then start mixing, which surprised me. Usually recipes have you beat the whipping cream first, but it came together. You use your hand mixer or stand mixer at medium-high speed for 2-3 minutes until stiff peaks. I was afraid I may have over-whipped it in the end because the cream got a little foamy at the edges (a sign of being over-whipped) as it was sitting out, but that wasn’t the case. The whipped cream is absolutely luxurious and delicious.
As soon as you’re done, you want to unroll your lovely buche, take a flat spatula, and carefully spread the cream over the now slightly flattened and creased roll, making sure not to disturb the sponge too much. Leave an inch on the sides so it doesn’t spill over. Then, you carefully roll it up again and cover it with plastic wrap this time. Refrigerate for 30 minutes, which gives you just enough time to make the ganache.
Now let me be clear, Sally’s Baking Addiction has never once failed me when it comes to recipes. I’ve tried her vanilla buttercream and Royal Icing recipes before, and the bakes are absolutely flavorful. However, I think the chocolate ganache is the only place that might lack a little love. It’s not bad by far, but simple. It tastes identical to a chocolate vegan ganache I made, following Vegan Richa’s recipe which uses coconut milk.
This is where I would experiment. Maybe add a kick of spice with chili powder, or sprinkle in nuts, or a touch of almond extract? Anyway, here’s the very simple two-ingredient recipe below.
Chocolate Ganache For the Buche de Noel
6 ounces semi-sweet chocolate, finely chopped
3/4 cup heavy cream
Sally’s Baking Addiction
You can run your chocolate through a food processor or manually chop them, but I actually forgot (oops) and it turned out fine. Heat your cream over the stove until it simmers (not to boiling point) and then pour over the chocolate. Let it melt for 2-3 minutes and then take your silicone spatula and blend it together until it turns a delicious chocolate brown color. As soon as it’s perfectly blended, it’s fine. Refrigerate it (uncovered, according to Sally) for 30 minutes.
What I like to do now is to take out the cooled sponge with the filling and the cooled chocolate ganache together. 30 minutes on the dot means that the pan of your ganache will still be slightly warm, but the ganache will be slightly lukewarm. If you would like it colder, wait a little longer. Sally’s recipe provides you with more than enough ganache to decorate.
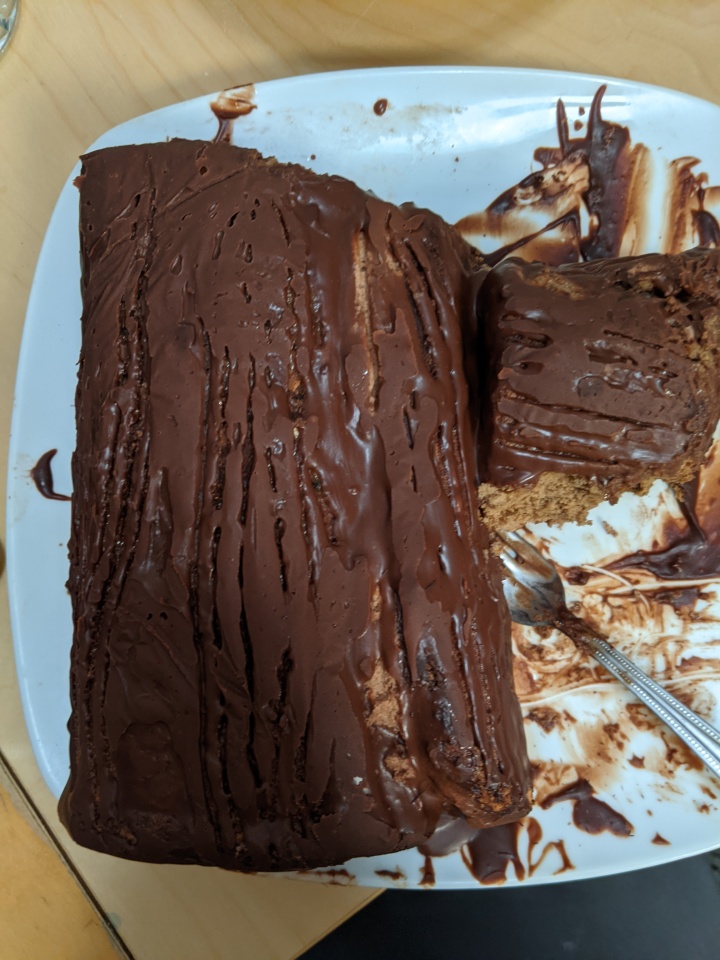
Before decorating, cut one a small edge of the log horizontally and place it on its side so it looks like a fallen tree. How delightful!
Then use a silicone spatula or a spoon to drip the chocolate ganache over the log. As you do, take a fork, and run it through the sponge so it looks like tree bark. Pretty cool huh? In a few minutes, the ganache will harden and then you’re ready to eat. Although you can eat it right away, I did. 🙂

The sponge is delicious and the cream is simply heavenly! Even with all the work, I would do it again. What do you think about this buche de noel? Let me know if there’s another recipe you have to recommend below.
Thank you Sally! This holiday baking session with buche de noel was super fun.
Leave a Reply